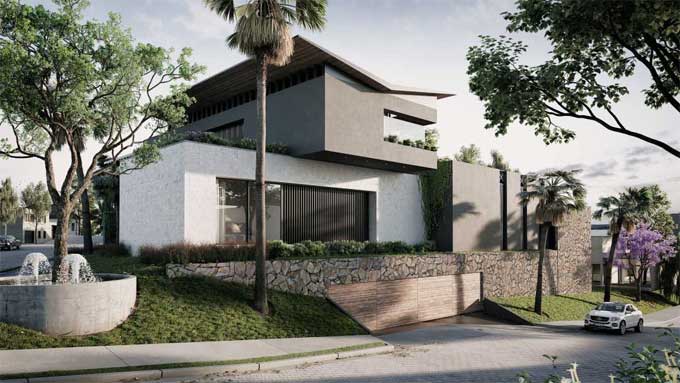
Seven Tips for Perfect and Realistic Renderings with Enscape

The creative processes and digital representation of architecture have always fascinated you as an architect and 3D artist. Your digital toolkit lacked a renderer that could keep up with your thinking speed, namely a real-time renderer. Enscape can help you meet that need. Now, you can create amazing images simultaneously to show the results of your design project as well as visualize them while you design it.
Visual references
Visual reference is crucial at any point in the creative process. Whether it is to learn from existing buildings or adopt trends or artistic movements for inspiration. Studying architectural photographers and analyzing their frame of mind, composition, lighting, and color choices will help you create realistic renderings.
Modeling
Modeling plays a crucial role. The quality of your model will decide your result regardless of how cool your rendering configuration is. It is preferable to think macro-to-micro when organizing this topic.
You start with global organizations like layers, components, blocks, and large elements, then go deeper into smaller details. You'll stay organized and safe from crashes if you work with this careful mindset, even if you create entire 3D cities.
Blocks
The choice of blocks you use is also crucial to capturing great images. The importance of geometry, texturing, and optimization cannot be overstated. A high-quality, detailed model can be weighed down by heavy blocks.
You should therefore be familiar with proxies for this reason. Using Enscape for SketchUp, you can import proxies that have already been edited.
It is also possible to edit them in the same document and then export them. It is always a good idea to verify the scale and unit of imported blocks and objects.
Lighting
It is critical to understand how light and dark interact, whether it is natural or artificial lighting. In your first step, you looked at architectural visualizations and examples of real-world applications, and you realized this is fundamental to your opinion. If you are designing a daytime or nighttime scene, consider these topics:
1. An especially clear sky at a particular time.
2. Shadows afternoon or at 6 p.m.
3. Based on the type of lighting system, a shadow can be hard or soft.
Making good renderings requires understanding the elements of lighting. Realistic reproduction of natural or artificial light will require you to observe each component of the photograph.
Texturing
Quality defects are the major shortcoming of 3D textures, including blurry, nondescript, extremely small, and pixilated textures.
It is important to find high-quality textures for every project. There's more to consider than that, however. In addition, seamless textures are important. Carelessness in selecting the texture can be seen in visible repetitions. You can find seamless textures on many websites, but if you are unable to find them, you can use image-editing software to fix this repetition.
Producing renderings is made easy with image editing software. A project can be edited mid-way through, not just in post-production. The Enscape Material Editor allows you to reproduce effects like 'bump' and 'reflections' from the default texture applied in 3D, also referred to as 'albedo'.
The amount of white and black on these maps may have to be changed in some cases to achieve the desired effect. You will get the above-mentioned effects, which will further improve the quality of your renderings.
Perfect Camera Settings
These all depend on the composition, the angle, and what you intend to illustrate. Every building photographer has their unique style, after all. Hence it is interesting to observe elements of their work you like and then try to recreate them.
Secondly, architectural two-point perspectives bring something special to the table. There are many professional photos displayed indoors or outdoors that show perfectly aligned vertical lines. Enscape allows you to enable this function. Several important requirements must meet when it comes to rendering settings:
1. Enscape will deliver the best possible lighting and shadow refinement if you choose the Ultra Quality option.
2. Make sure you have selected a resolution for Capture. Custom formats are also available, such as square proportions. There's no need to take every photo in landscape format.
3. When editing post-production, be sure to check the Export Material ID and Depth Channel boxes. As a result of these channels, you can greatly enhance your ability to edit parts of an image.
Final Refinement
The settings, lighting, texturing, and camera are all perfect. Your image is ready for saving. The real-time nature of Enscape makes it possible to look for errors or details that can improve during modeling. The following tips will help you prepare before rendering:
Set the camera to a specific position.
1. You can save the camera location if you already have carefully adjusted the angle you want to portray but need to zoom in to adjust a detail. Then you will not have to find the same position again when zooming in.
2. Verify that no flying or blocking objects are present.
3. Make sure grass material for outdoor images does not encroach on any floor space.
4. Ensure artificial lights are not too strong, etc, and that the surrounding material blows out to white. In addition, dark areas lose material quality and information.
You can click on the button for rendering. Then select the location to store the image, and choose the format first before clicking the Save button.
To get online demonstration of the latest version, watch the following video tutorial.
Video Source: Llyan Austria


