SketchUp Extension Review: Artisan

Ease of use, simple interface, and flexibility are the main reasons behind the enormous popularity of Trimble SketchUp. The said flexibility of SketchUp comes from the ability to upgrade, enhance, and change the way its default tools behave by the addition of a myriad of extensions from outside. SketchUp Pro and above enable this feature for the users, who can find these extensions in the SketchUp Extension Warehouse 2.0 or some third-party web sites.
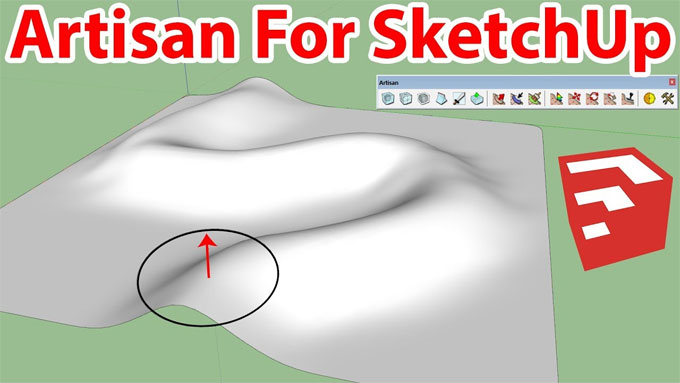
Artisan is one such extension or plugin. This powerful plugin can turn SketchUp from a 3D geometric designer to a 3D organic modeler. In other words, Artisan lets you design your model with such complex geometry that the result looks and feels like a natural object. For example, you can literally draw a lifelike flower using the Artisan extension.
Previously, Artisan was released with the name "Subdivide and Smooth" and it was a hit then already. Developer Del has worked hard for two years over it and the child of this labour is what we see as Artisan - a complex remake and upgrade with a plethora of added features.
The extension exposes itself in the form of a toolbar with large, friendly-looking buttons. Each button represents an important function, and they are arrayed in four basic functional groups. These are Surface Subdivision, Sculpting Tools, Vertex Transformation, Mesh Optimization. Let us delve further into each group below.
1. Subdivision Surfaces
These functions are used for smoothing a given hard geometry by introducing more subdivisions in the object to make it appear more organic and softer. The robust subdivision algorithm works blisteringly fast on any number of selected faces, groups or components. You can also use the Crease tool to create hard edges from edges or vertices. The Knife tool will let you create loops and the Extrude tool will further help you in this by making loops without interior faces. With the latest version of Artisan, you can preview the subdivision content change before committing. The Proxy button presents you with a low-poly mode that updates subsurface geometry in real-time parallel to your editing.
2. Sculpting Tools
Any sculptor, be in the real world or digital, will want to manually alter the model by hand. This toolset is intended for that cause precisely. The functions here provide you with an interactive cursor that intuitively changes as you switch between modes. There are the following four sculpting functions provided in this group:
a. Sculpt Brush: Use the arrow keys to change the size and strength of the cursor and switch between five creation modes (sculpt, pinch/spread, flatten, inflate/deflate, smooth/jitter) by right-clicking as you draw on the model to create shapes as you please. The red shadow beneath the context-sensitive cursor will show you the affected zone.
b. Select Brush: you can gather up faces as you draw strokes with this brush.
c. Paint Brush: does what the name implies, as in any image editing software. Except for that here instead of painting colors you are going to use materials from the library.
d. Brush Mirror: why work on one side of a symmetrical model if you can simultaneously work on both sides? This nifty tool will reduce your work by half. Aside from these, you can also loch vertices on a user-defined plane before using the brushes so that they don't change accidentally.
3. Vertex Transformation
These tools enable you to perform movements on a surface. There are the following four tools:
a. Vertex Select: this will let you soft-select or hard select portions of a surface to define exactly how much should get changed.
b. Vertex Move: This also has the soft and hard modes, using which you can move the face portion or selection held under cursor in any direction you wish. Use arrow and shift keys to be more definitive in the movements.
c. Vertex Rotate: Works the same as above but it rotates the face instead of moving it. It can cause some pretty interesting results.
d. Make Planer: this is akin to flattening tools in most editors. It can flatten vertices along the XY, XZ or YZ plane as defined.
4. Mesh Optimization
Also known as Polygon Reduction, it will let you create detailed meshes very quickly. This tool works much faster and less prone to glitches than other similar plugins. This comes indubitably very handy when your model contains too many polygons and the rendering engine is struggling to keep up. Of when you have a really low-end video card.
The following video from TutorialsUp can visually explain how to use Artisan in SketchUp:
Video Source: TutorialsUp
The Artisan extension for SketchUp Pro or above is available in the Extension Warehouse, in their own website, or in the sketchUcation site. It is free to use for 15 days, after that you will need a paid key to unlock it. It requires a payment of $27 (as of now) to use the unlocked 1.3.1 (latest) version.
On the ending note, there is certainly no other extension that comes close to Artisan in creating organic models with this much ease and yet with so much complexity. Using Artisan will blow your mind even if you aren't a digital artist. If you are, then installing this SketchUp extension is like starting Christmas early!