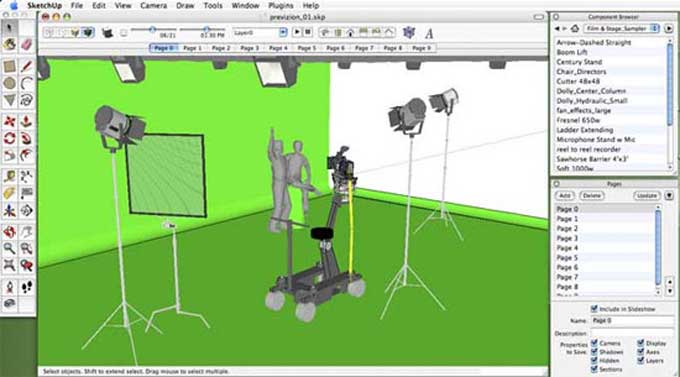
How to use the Animator Plugin with SketchUp to create Animation

SketchUp is a 3D modeling program that's free and easy to use for hobbyists, students, and professionals alike. Additionally, plug-ins can be added to the program to allow individual elements to be animated separately, making it even more powerful. Web or desktop versions are available. A full license can be purchased once for a fixed price, as well as several annual subscriptions.
SketchUp is not only a CAD tool, but it can also create basic fly through. That is just a basic introduction to animate in SketchUp. For the purposes for which they designed, native animation tools are more than sufficient.
Basic Animation of SketchUp
In SketchUp, you can move an animated video camera through space using its native animation. To showcase architectural designs, landscapes, or detailed interiors and exteriors of building models, this is best suited for animate a walkthrough or flythrough of a static model.
It's easy to create an animation by capture the key scenes you want to use, & then arrange them to your liking. The smoothest path from one scene to the next does not have to capture every time. SketchUp will calculate this for you.
Workflow
1. Start out by creating and capturing your first scene. When you click View > Animation > Add Scene, you will be able to capture a scene.
2. With a camera, you can rotate, pan, and click the middle mouse button. The camera toolbar also offers these options.
3. In the Toolbars window, click Camera > View > Camera Toolbar. The left mouse button can be used in place of the middle mouse button when commands are selected in the toolbar.
4. Drag and drop the scenes in the scenes bar to arrange them into the desired order by right-clicking them. Furthermore, each scene can rename in the Scenes Dialog.
5. You can adjust the settings for scene transitions and delays by selecting View > Animation > Settings. During the transition between scenes, the camera travels to the next scene, while during the delay between scenes, a pause allows. A scene delay is essential for smooth animation.
6. After arranging your scenes, you can take a look at how each scene flows into the next by selecting the next scene from the scenes bar. View > Animation > Play will play the whole animation.G. Choose the video format you want when you go to File > Export > Animation > Video.
Animator
SketchUp users will find this plug-in extremely useful. The interface is intuitive and allows users to manipulate animations easily. The extension allows you to animate objects in SketchUp in various ways. It develops by Fredo6. SketchUp 6 and older can use the Animator extension.
Workflow of Animator
Object Configuration
Animate your objects by placing them in their original positions before creating movements. You can save your position by clicking save current position and naming it Original Position. All objects will start at the positions defined by the current setting, which will save as the default. You'll also be able to animate more easily if your objects group according to their movable parts.
Configuration of Camera
Add a camera to the timeline by clicking the camera icon, then choosing New Camera. You can see what you want to capture without the timeline shows.
Get a sense of what you want to include in your animation by walking around the scene. Click Capture Current View Camera after you have set your settings. Click the check icon to save it. Renaming this will make it easier to identify in the future.
Your animation can have a variety of camera angles. Similar to SketchUp's native animation tool, the software also finds a simple path between different scenes.
Timeline Use
If you wish to move, click and drag the movement or animation to the desired location.
You can also stretch or compress animation elements by dragging their edges.
By dragging the timeline, you can create parallel sections in which multiple animations play simultaneously. The right-click option provides access to tools that help you arrange elements in the sequencer, such as cut, copy, insert space, and select.
You can preview animations in the clip editor by dragging the red arrow across the timeline.
Video Exporting
In the clip player, you can play your animation after creating and arranging all the elements. In both the clip player and in the clip editor, there is a button called "Generate Video," which will export your animation as a video. Before exporting your animation, you must install Animator. In addition to setting the frame rate, speed, and resolution as you create the video, you can also choose what file format the video should export.
Wrapping it Up
SketchUp is primarily used for creating or editing 3D models. It is an easy-to-use 3D modeling tool. Designers, architects, and makers love its simple modeling tools and gentle learning curve. You can register to use a free web application which is available in a variety of forms.
To learn more, watch the following video tutorial.
Video Source: TheSketchUpEssentials
With the Animator, you will not be able to create Hollywood-quality animations as you would with Blender, 3DS Max, or Maya.
As a result, Animator is a good choice for quick and simple presentations that feature assemblies and mechanisms. It is more like engineering-related CAD animators, such as Solid-Works' animation tool, as opposed to the previously mentioned programs.


