A Guide to Creating Realistic Lighting in SketchUp and Enscape

Enscape real-time rendering plug-in for SketchUp allows you to create stunning, realistic renderings in a matter of seconds. Engineers and architects use Enscape directly in SketchUp, so they can view a virtual reality simulation of their design as they create a SketchUp rendering.
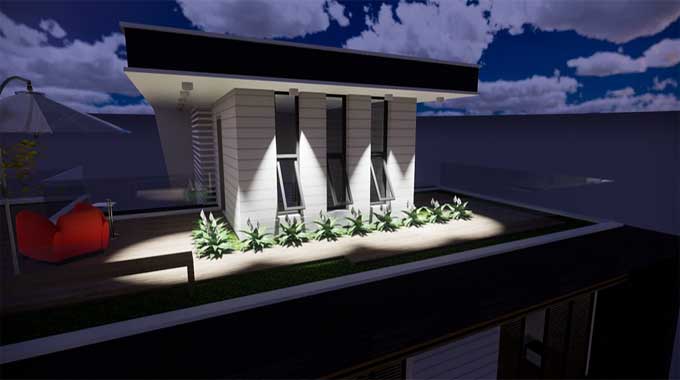
In order to achieve realistic results with any interior renders, we must always focus on lighting. We need to seek even illumination with soft shadows and visible contact shadows.
The task can be accomplished in Enscape by combining the different light types (line, spot, sphere, rectangle, disk) in groups to produce more control over the shadows and the lighting.
The main ideas behind the lighting setup are explained below:
1. Outside lighting or Atmosphere
In this case, we will decrease the sun's intensity by about 20%, clear the horizon, and bring the shadow sharpness to zero. That way, the yellow tones from the sun and the blue tones from the sky will be drastically reduced.
2. Fill lights or portal lights
When we have all the lighting fixtures in place, we must add fill lights or portal lights made of multiple lines. These lights will provide soft shadows and a lot of ambient light to the scene.
3. Detail lights
Lights, in this case, are used only on the inside of the room, just like photographic lights to enhance a final photograph. In this case, the lights are gently rotated around their axis to spread the light and shadows. In addition to creating soft shadows, they also produce contact shadows (e.g., where furniture touches the floor, or where spotlights touch the ceiling, and even when an object is close to a wall).
4. Final adjustments
When all the lights are set up, check the exposure to ensure the image is not overexposed. We sometimes have to view the live rendering in black and white so that we can get a feeling for the light balance in the image without the colours of the materials.
The saturation should be reduced (just decrease it in the image settings).
For example, If we had a 3D building outside that was dark, we would have to use big rectangles with an emissive material to bring some light to the building without creating hard shadows.
Reason for using Enscape in SketchUp
Enscape SketchUp's render plug-in allows you to create animated fly-throughs, walkthroughs, and animations using your model to experience it in 3D.
In addition to high-quality rendering assets, the Enscape plug-in also includes a materials editor and lighting options. Furthermore, you can export your design so that others can view it and review your work, enabling you to communicate your ideas more effectively.
If you export your model and web links, others can view them and review your ideas, enabling you to communicate your ideas and designs in any format that is suitable to your audience.
To learn more, watch the following video tutorial.
Video Source: Architecture Inspirations
Conclusion
Lighting is always a critical factor when it comes to creating realistic interior renderings. It won't even produce soft shadows or visible contact shadows without lighting.
Enscape's grouping capabilities allow us to use different light types with greater control over shadows and lighting.