SketchUp Tutorial: How to Paint a Castle
There are many different artistic techniques that can aid with your digital painting, but it is undeniably difficult to create 3D artwork from nothing.
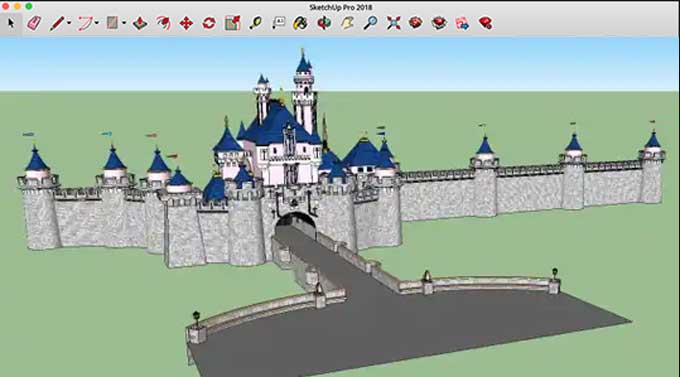
It can be difficult to choose the correct perspective for a complicated structure like this palace, and if you're not a quick model, trying to construct a 3D locate might slow you down.
To hasten the painting process, enter SketchUp, a straightforward 3D sketching application that is surprisingly simple to learn how to use. We'll now walk you through the process of creating 3D footings using this free program.
Steps to painting a 3D model of a castle
The purpose of this article is to teach you how to understand a complex stage from every possible perspective, as well as a few key concepts in digital make-up, including value structure, texture brushstrokes, color temperature adjustments, and many others, so let's get started.
Step 1: Find out what SketchUp has to offer
While we do not aim to completely bypass this software, we prefer to get to grips with the essential tools that you need to efficiently and effectively model.
This software will help you to become more efficient and to save time and resources. It will also allow you to focus on the creative aspect of the modeling process. Ultimately, the goal is to give you the tools you need to create amazing models in a fraction of the time.
Step 2: Add our architectural models
Use real-world architecture observations to help you target unique features like windows, archways, and fortifications to expedite the modeling process.
Click the target faces to apply the textures, then use the Material panel's little folder icon to choose the texture you wish to use.
When you're prepared to go on to a more comprehensive modeling pass, you may decide by applying for this rough composition pass on the basic 3D publications.
Step 3: Take advantage of SketchUp's style modes
Similar to how Photoshop's filter effects affect photographs, styles in SketchUp determine how your model will be shown.
The model may be seen as line art, brushwork, basic texturing, etc. Two styles—the line art style and the basic style—are required for this painting basis. These will serve as passes for directing the painting procedure.
Step 4: work with the shadows
In order to create engaging compositions, the shadow is a very effective technique. SketchUp's Shadow option allows you to see how different shadows and lights affect your model depending on the time zone, date, and time of day.
You can store different camera angles using the Scene Management tool in SketchUp. One of the main benefits of using a 3D foundation over typical thumbnail sketches is being able to view your scenario from all angles.
Transfer your model to Photoshop
Bringing the SketchUp passes into Photoshop after all your hard work is complete will allow you to apply the following steps:-
Step 1: Add a few colors
Rather than allowing the 3D passes to restrict your creativity, it's important to use them as a guide. Here, we decreased the Opacity of the basic texture layer and added a new layer on top of it. The canvas was then painted with textured brushes using a variety of colors.
You can see that you don't have to allow the colors on the basic texture layer to determine your palette because we utilized a light purple/blue tone to enhance the painting's vibrant colors.
Step 2: Add a 3D layer on top
You'll need the 3D base back at some point throughout this freestyle painting process to provide you with more guidelines for the architectural structures.
Hence, make a copy of the basic texture layer and apply it to the artwork. To make the layer mix with your picture, change its Opacity.
Step 3: Highlight the necessary texture
To give the main castle buildings additional detailing, use images on top of the artwork. As the architectural elements are great for the top section of the castles, you may get better results by using some church photographs.
We utilized the Transform tools to use the perspective of the sections we had cut out to better match the artwork.
Step 4: Apply paint to the photos
Be cautious while integrating photos since you don't want to ruin the pleasant brush feel you've already established.
To make the photographs more resemble the rest of the artwork, repeatedly paint them with a tiny, textured brush. Repeat this cycle as many as necessary by painting over the photographs and erasing portions of them.
To learn more, watch the following video tutorial.
Video Source: HL ModTech
Step 5: Add meaning to your models
Adding characters at this point will give a sense of scale and hint at some vague storyline at the same time.
Introduce a few characters, each with their own unique qualities that set them apart. Show the environment they inhabit, whether it is a bustling city or an isolated forest. Allow the characters to interact with each other and the environment, hinting at the possible plot of the story.
Step 6: Applying finishing touches
You can adjust the brightness, contrast, and color temperature of your painting using adjustment layers. Adjustment layers are a great way to enhance your artwork without permanently altering the original image.
They can also be used to quickly add effects to multiple layers at once. Additionally, adjustment layers are non-destructive, meaning you can change or remove them at any time without affecting the original image.