Create unique Maps and Textures with SketchUp and Thea Render

While working upon the architectural projects the minute geometry based details was disabling SketchUp. Out of Curiosity I tried the most versatile renderer Theo Render as it runs on the engines which combines both GPU as well as CPU.
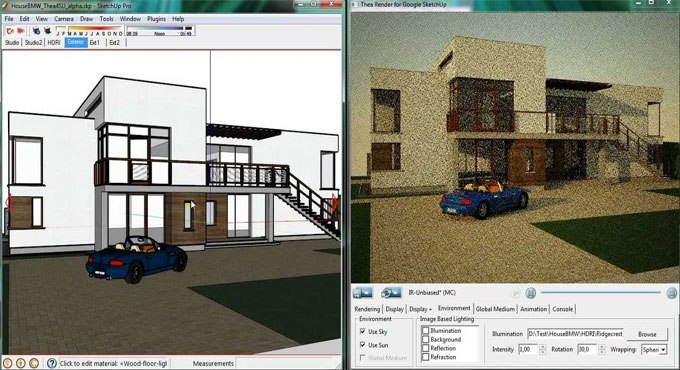
SketchUp Modelling
In SketchUp I used my model as a meter square plan.
Now to add more perfection to it I used the offset Tool to create the outer edge, crafted four outer beams and four planks by drawing lines. Turn by Turn I selected each section minutely and created a group.
While modelling my projects by using the texture tools as it drafted wood and metal textures into the model. Then I projected each group to the correct height.
To increase more efficiency into my project used the round edge tool to create the shape of the objects.
The next process was detonating all groups and regrouping as one object.Now using the round edge carve tool I created a cylinder pressing it to make the rivets, then I grouped the rivets in one group.
At this point change the view in SketchUp on top and zoom it until it fills the work area on top as well as bottom. Open the SketchUp and convert the entire design to Thea plug in, set the scene resolution to 512 x 512.
Using SketchUp?s parallel and perspective view tried to fit my model in the red square.
Crafting exclusive designs with Thea Render
Using a light tent HDRI transfer the scene to Thea so that the model doesn?t cast shadows.
To facilitate ambient occlusion and set multiply use BSD render service.
The unique feature of Ambient occlusion[AO] helps to control the tracing depth of reflective and refractive surfaces. So the next step is to select the AO and the normal channels.
Accentuate your image by saving the colour ,ambient occlusion and also save the normal image. One must save the scene so that one can restore the larger map.
Working with Textures in SketchUp and Final Renders
Use your model as 1m square cube in SketchUp and create new textures from the Texture map. To add details and realism in to the models, we use the texture button. One can really visualize and create the models by using diversified textures. Sketchup?s texture button facilitates by creating real effects using the different textures.
Next step is to group the cube and apply the texture,and then follow the process by selecting all the faces by using TOM TOM?s UV Tool Kit ?fit to quad faces?.
Transfer the cube to Thea and add the normal map. Set the value to about 20% and initiate a test render.
If the model looks good re-render your maps at a higher resolution.