Beginner to Professional tutorial for 3d printing Text in SketchUp
SketchUp, a free 3D modeling program, can create 3D objects. However, if you want to use more of the features of the application, you need to upgrade to the premium edition. The easiest and fastest way to create 3D text is with SketchUp. Visit the official website of SketchUp to download it if you don't already have it installed on your system. After downloading the installer, install SketchUp on your computer.
Template Selection in SketchUp
Choose a template in SketchUp after opening it. For example, you should choose Architectural Design Template and then select Millimeters. You can print your 3D text by selecting Millimeters under 3D Print at the bottom of the page. That will display the build space of the Makerbot Replicator 2X. You can change the model of the build space.
Keep the middle mouse button pressed and move the mouse to orbit the model. You can also click space and select Orbit. You can pan the axes by pressing the Pan button next to Orbit.
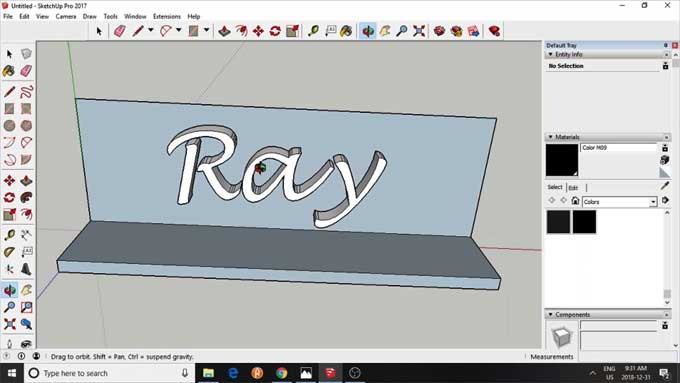
How to create 3D text in SketchUp
The 3D text feature in SketchUp can be accessed by clicking on Tools and choosing the 3D text. Then write your text and pick your font. SketchUp will use the fonts in the regular font’s folder on your computer.
You can set the height by clicking on the two rows. You can set the height of each letter by clicking on the first row. Based on its height, the length of a letter differs from font to font. It is usually a bit more than 50% in most fonts. Your text's 3D dimension is defined in the second field under Height. If you want to extrude the text, choose the Filled and Extruded options.
Place your text in your workplace when you are finished entering and formatting it. You can easily change the size of your 3D text if you are not happy with it. Before you corrupt the file, you should first save it.
Adjusting 3D Text in SketchUp
You can surround your text with a blue rectangle by clicking on it. When you click on Scale, you will see little green blocks. You can scale the text by clicking on one of those blocks and dragging or pushing it.
You can move the entity by clicking on Move and then dragging and dropping your text. Make sure the text is selected before dragging.
You can rotate your text by clicking Rotate and selecting a face parallel to the axis you wish to rotate around. Defining a position of zero degree and starting to rotate your object by an angle is the next step.
Base Building
Especially if the text is going to be printed, there needs to be a base. You can select the rectangle from the Shapes menu. You should start with the bottom corner point and then a diagonal point directly across from it.
Select Push & Pull from the drop-down menu. Click the rectangle. It is possible to enter or drag a rectangle and save the base size of the file.
Export to STL
SketchUp requires a free plug-in if you want to save your model as an STL file for 3D printing.
You can import and export STL files using SketchUp's official STL import and export tool. Make sure you have selected all of the objects you want to export. You can save the STL by clicking on File and Export to STL.
Now you have a 3D printable file that you can open in your 3D printer’s slicing software in order to prepare it for printing.
To learn more, watch the following video tutorial.
Video Source: MInteractiveLearning
Read More all3dp.com