Why do you need to try this Enscape Extension for SketchUp users?

This Enscape plugin is just one of several that can be used in conjunction with your 3D modeling software when designing a model, so it's important to have adequate and efficient lighting, which is why your 3D modeling software needs some lighting plugins.
Enscape version 3.3 for SketchUp is really amazing and provides enchantment in real-time. Designers now build differently thanks to SketchUp's Enscape lighting and Enscape rendering.
Upon finishing this article, you'll know everything there is to know about using Enscape for lighting in SketchUp, what Enscape for SketchUp is, and why you'll love it so much.
Escape extension
Enscape is one of the most popular plugins in the architecture, engineering, and construction fields for its ability to render 3D images in real time, as well as VR.
It is the ability to render real-time models and experience the virtual reality that empowers your designs, enhances your workflow, and enables you to bring your imagination to life in a new way. As it can be directly used in your modeling tools, you can focus on the important things: creating, designing, and building.
Enscape: Why Should You Use It?
The reason you'll want to keep using it again and again when you discover it is that it has so many benefits. The Enscape software simplifies rendering as well as creates animated walkthroughs, VR experiences, and many other functionalities.
There is no doubt that it is remarkably valuable for that reason alone as it's this type of experience that persuades clients, informs wise judgments, and speeds up the approval process.
Real-time technology allows customers to see your work as a fully rendered 3D tour from any perspective, at any time of day, and with any type of lighting. Instantaneous updates are made thanks to the live communication between the application and your CAD tool.
Through inspiring realism, virtual reality enables you and others to explore designs. All you have to do is connect a VR headset so you may fly or stroll through your project while taking in breathtaking images.
You may effortlessly collaborate with others, whether they be designers, clients, or someone else, thanks to the wide variety of export choices. They can understand it easily, and no specialized software or technology is required.
Additionally, the incredible selection of atmospheric settings makes it a joy to use hyper-realistic lighting to build mood and character. It is infinitely adjustable, down to the time of day and cloud cover.
What is new in Enscape version 3.3?
Enscape 3.3 is loaded with new features as mentioned below:-
1. With the new Enscape 3.3’s OpenStreetMap data, you can be used it to visualize surroundings in your renderings.
2. New Reflection features in the new Enscape make details appear with stunning realism.
3. You can easily render transparent backgrounds in Enscape 3.3 thanks to the Alpha Channel export.
4. With camera optimization and customization, SketchUp and AutoCAD users will save a great deal of time and benefit from improved navigation.
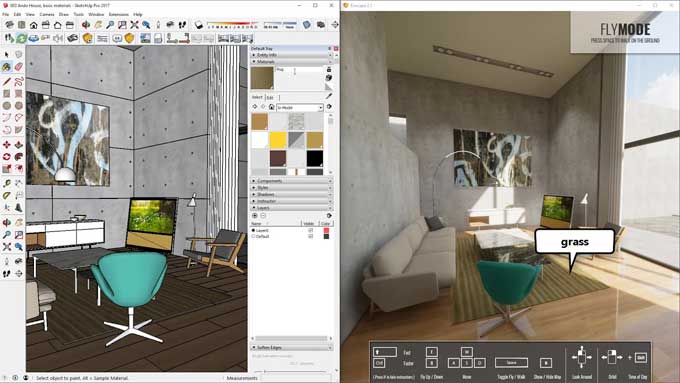
Enscape Rendering Using SketchUp
Steps to render using the Enscape for SketchUp:-
Step1: Install Enscape first, and it will appear in the SketchUp Extensions section, the Enscape toolbar is now accessible for use.
Step2: By selecting the Start Enscape button, you may start a project.
Step3: Click on the Take Screenshot or Batch Rendering option in the Extensions menu of SketchUp to produce a stunning rendering. Even though this is only a synopsis of the procedure, it becomes evident just how very simple the tool is to use.
Lighting features in Enscape
A SketchUp style of Enscape lighting is just as stunning as the actual Enscape lighting itself. The Enscape Objects window will enable you to access the lights used by SketchUp if you do not have any lights in SketchUp itself.
The Extensions menu option can be accessed using the Configure menu option in SketchUp, or by means of the ribbon under Enscape. Enscape 3.3 comes with five different integrated lighting options for you to choose from.
Sphere-type lighting: This kind of light radiates equally in all directions from a single point. Put the light in a place with a second click after choosing the surface or axis on which it will be based. The light's intensity can then be changed.
To learn more, watch the following video tutorial.
Video Source: Ruben Borup
Spot-type lighting: Four clicks are required to position a spotlight, with the first two fixing the endpoint and the next two sets the cone's orientation.
Click to choose the surface or axis the light source is based on to position a spotlight. Click once to specify the light source, then move the mouse to specify the axis or direction you want the light to travel along or toward.
Disk-type lighting: With the exception of the beam form, they act essentially identically. The Rect and Disk lights have the same form at both ends, but the Spotlight source is a single point.
Like the Spot Light, place them with four clicks. One pink control point is included on the Rect light. In Enscape Objects, the sliders may be used to do the same task.
Line type lighting: You can change the length of line lights, which are linear fluorescent lights that have a length of up to 3m. Place them with the two-click method again, then define them and rotate them as needed.
Coloring-type lighting: In SketchUp, the Paint Bucket tool allows you to add color to lights. Apply color directly in the Enscape window after choosing it in the Material Editor.