Creating a Custom Duvet Design with SketchUp: A Step-by-Step Guide
Duvets are an essential part of bedroom decor, providing not only warmth and comfort but also a key visual element that can define the style of your space. Customizing a duvet can be a fun and creative project that allows you to express your personal style.
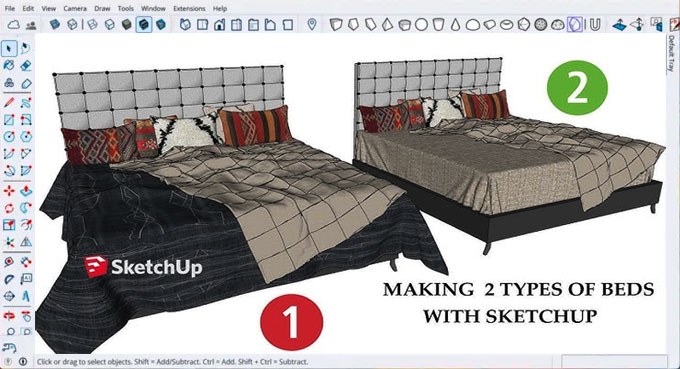
With SketchUp, a powerful 3D modeling tool, you can bring your design ideas to life before they even reach the fabric stage.
Why Use SketchUp for Duvet Design?
SketchUp is widely known for its user-friendly interface and versatility in creating both simple and complex models. When it comes to designing a duvet, SketchUp allows you to:
A. Visualize your design: SketchUp’s 3D modeling capabilities enable you to see how your design will look in a realistic space, giving you a better sense of scale, color, and texture.
B. Experiment with patterns and colors: Easily swap out different designs, patterns, and colors to see what works best for your duvet and bedroom decor.
C. Create accurate measurements: Ensure your design fits perfectly on the duvet by using SketchUp’s precision tools.
Step 1: Getting Started with SketchUp
1.1 Download and Install SketchUp
If you haven't already, download the latest version of SketchUp from the official website. SketchUp offers a free version, SketchUp Free, which is perfect for beginners and casual users. For more advanced features, consider SketchUp Pro, which offers additional tools that can be helpful in the design process.
1.2 Familiarize Yourself with the Interface
Before diving into your duvet design, spend some time exploring the SketchUp interface. Key features to get comfortable with include:
A. The Toolbar: Contains essential tools for drawing, moving, and modifying objects.
B. The Drawing Area: The central workspace where you’ll create your designs.
C. The Measurement Box: Allows you to input precise dimensions and measurements.
D. The Components Window: Helps you manage different elements of your design.
Step 2: Setting Up Your Workspace
2.1 Create a New Project
Start by creating a new project in SketchUp. You can choose to start with a blank canvas or use one of SketchUp’s templates. For a duvet design, starting with a blank canvas is often the best choice, as it gives you complete control over the design process.
2.2 Set the Dimensions
A typical duvet cover for a queen-sized bed measures approximately 90 inches by 90 inches. However, this can vary depending on the size of your bed. Use the Tape Measure tool to set the dimensions of your workspace to match the size of your duvet.
To do this:
A. Select the Tape Measure tool from the toolbar.
B. Click on one point in the workspace and drag to the desired measurement, then click again to set the dimension.
C. Repeat this for both the length and width of the duvet.
Step 3: Designing Your Duvet
3.1 Drawing the Base Shape
With the dimensions set, you can now draw the base shape of your duvet. Use the Rectangle tool to draw a simple rectangular shape that matches the measurements you set in the previous step.
A. Select the Rectangle tool from the toolbar.
B. Click on the starting point of your rectangle, drag to the opposite corner, and click again to create the shape.
3.2 Adding Patterns and Textures
Now that you have the base shape of your duvet, it’s time to get creative with patterns and textures. SketchUp allows you to import custom patterns or use pre-existing ones.
A. Using Pre-Existing Textures: SketchUp comes with a variety of built-in textures. To apply one, open the Materials window (found under the Window menu), browse the available textures, and click to apply one to your duvet design.
B. Importing Custom Textures: If you have a specific pattern in mind, you can import it into SketchUp. To do this, go to File > Import, and select the image file you want to use. Once imported, you can apply the texture just like any other.
Experiment with different patterns, colors, and textures until you find a combination that you love. Remember, you can always change the design later if you’re not satisfied with the initial result.
3.3 Adding Details
To make your duvet design even more unique, consider adding details such as piping, embroidery, or buttons. These elements can be modeled in SketchUp and applied to your design.
A. Piping: Use the Line tool to draw the piping around the edges of the duvet. You can then apply a different texture or color to the piping for contrast.
B. Embroidery: For embroidery, use the Circle tool to create small, detailed patterns that can be placed strategically on the duvet. You can also create custom shapes using the Freehand tool.
C. Buttons: If your design includes buttons, use the Circle tool to create small circles and place them in the desired locations. You can add a depth to these circles using the Push/Pull tool.
Step 4: Visualizing Your Design in 3D
4.1 Rotate and View Your Model
Once you’re satisfied with your 2D design, it’s time to see how it looks in 3D. Use the Orbit tool to rotate your model and view it from different angles. This will help you get a better sense of how the design will appear in real life.
A. Select the Orbit tool from the toolbar.
B. Click and drag to rotate the view around your duvet design.
You can also use the Pan and Zoom tools to adjust your view and focus on specific areas of your design.
4.2 Applying Lighting and Shadows
To make your design more realistic, you can add lighting and shadows. This will help you see how your duvet will look under different lighting conditions.
A. Go to View > Shadows to enable shadows in your model.
B. Use the Shadow Settings toolbar to adjust the time of day and year, which will change the angle and intensity of the shadows.
Step 5: Finalizing and Exporting Your Design
5.1 Review and Refine
Take some time to review your design from all angles. Make any necessary adjustments to the patterns, colors, or details. It’s important to be completely satisfied with your design before moving on to the next step.
5.2 Exporting Your Design
Once you’re happy with your design, it’s time to export it. SketchUp allows you to export your design in various formats, depending on what you plan to do with it.
A. Export as an Image: If you simply want to share your design with others or use it for reference, you can export it as a 2D image. Go to File > Export > 2D Graphic and choose the desired file format (JPEG, PNG, etc.).
B. Export as a 3D Model: If you plan to use your design in another 3D modeling program or send it to a manufacturer, export it as a 3D model. Go to File > Export > 3D Model and choose the appropriate file format (such as .dae or .obj).
To learn more, watch the following video tutorial.
Video Source: Sketchup Guru
5.3 Bringing Your Design to Life
With your design finalized and exported, you can now take the next steps to bring it to life. If you have access to a fabric printing service, you can have your custom design printed on fabric and sewn into a duvet cover. Alternatively, you could use your design as inspiration for a handmade duvet project.