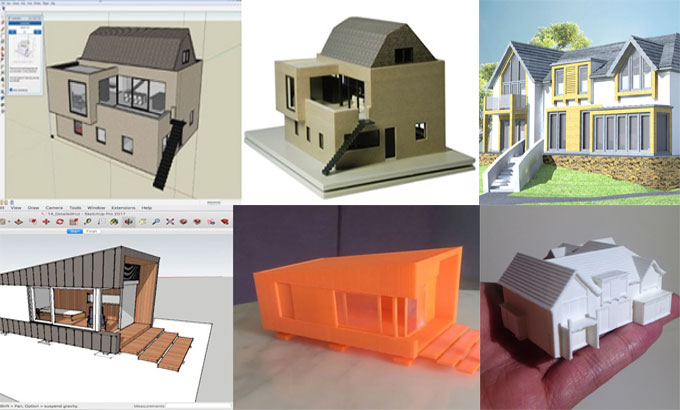
How to do 3D Printing with SketchUp

Formerly owned by Google, now Trimble SketchUp is one of the most popular 3D designing and modeling software today. Technically speaking, it is a surface polygon modeler, which means the software sees all components inside it primarily as edges or faces. The popularity behind SketchUp lies in its user-friendliness. With a neat, clean, uncluttered surface, you can start your model without knowing the first thing about 3D designing. Also, another point in its favor is the versatility of the tool. You can use SketchUp in architectural designs, mechanical designs, digital art, small modeling, and also as a 3D printing base. We will talk about how to 3D print with SketchUp in this article.
It is relatively easy to 3D-print your models from SketchUp. However, you make sure your model is compatible with printing, you need to adhere to some simple guidelines. It is obvious that before starting to print the designer has to make sure the 3D printer understands the model data and has valid objects to print. It may be a little tricky for a beginner to understand exactly why a model is not coming out as designed, or why is the printer refusing it downright. This is why we have created some simple tips to guide you in making your model 3D-ready. These guides are explained below.
A. Obey Gravity
First and foremost, from the point, you start building your model, you have to think about this. Generally, when people start a 3D design, they make the model floating in space. But if you want your model to be physically created directly from that very design, how can a 3D printer make the model float?
This is why you need to make sure that your model obeys the rule of gravity. That is, ensure that the model is lying flat on the X-Y surface. This will let the model have a base. Because a 3D printer prints by layers, it will start at that base and go above. If the model has no base, the printer will not have anything to build the first layer upon.
B. Set Scale
Every printer has a finite scale into which it can build. Supposing you are designing a house with a feet-inches scale, how do you think your 3D printer will receive it? It can?t, it doesn?t have the capacity! Besides, many 3D printers have their own measuring scales. You have to make sure that your model?s scale matched that of the printers. Generally setting up your template scale at millimeters or inches will do it nicely.
You can do the above easily. Just change the scale-template by clicking on Window > Preferences > Template and selecting ?3D Printing ? Millimeters? or ?3D Printing ? Inches?.
C. Get on the STL wagon
The standard file extension for saving SketchUp models is ".SKP", however, a 3D printer generally only understands ".STL" files. Trimble SketchUp by default is unable to create STL files. To do that, you will have to install the STL extension from their online store. Don?t worry, it is completely free. However, a point to note here is that since only the Pro version of SketchUp lets you add extensions, you would have to pay for a SketchUp Pro.
Once the STL extension is plugged in, you can use that to export your model to STL file format which your 3D printer will be able to recognize and print. Not only that, you can use this file format to share your model throughout the community. Also, since STL is a binary format, it will noticeably reduce the file size.
One thing you will need to remember while exporting to STL. Make sure that you choose the same scaling unit while exporting, as the model?s template.
D. Solid Stuff
Think about a scenario - you want to print a surface. Just one surface, flat and point-thin. You can print it on paper easily, yes. But how will you 3D-print just a surface, a line, a point? It is inconceivable even in the mind, let alone physically possible. You can 3D-print only that which definitely has a measurable volume.
This is why you need to make sure that the entirety of your model is comprised of solids, not thin faces or worse, lone edges. For example, if you are making a wall, give it some breadth. And then group the surfaces to make a solid object. Only then your 3D printer can see that thing as a printable matter.
Deriving from above, it is obvious that your model cannot have hollow objects. This is called making your model water-tight. Think of it this way: if you submerge the model, can water get inside the surfaces? If it can, then you need to patch up those holes or gaps. You can verify this easily by triple-clicking an object and check the entity info. If it is a solid group, SketchUp will tell you so. A better way is to install the Solid Inspector 2 extension from the 3D Warehouse which does pretty much what the name implies.
E. Face-Off
Also called Inverted Normals, sometimes in 3D modeling you may have put some surfaces in the wrong direction. That is, what should have been facing inward is facing outward. Making wrong push/pull operations are the most common culprits in this. So, turn on the monochrome view and see if you can see any light blue dotted patterns on some surfaces. These are the inward surfaces wrongly facing outward; fix them or you will face issues. The context menu will be able to reverse the wrongly-facing face. Or if you are using the Solid Inspector 2, it can do these automatically for you.
F. Everybody Loves Smooth Skin
The curved surfaces you have put in your model will often have only a few numbers of sides in them. For example, by default, a circle will actually be a composition of 24 edges arranged circularly. By default, SketchUp hides this. You will need to turn on the Hidden Geometry to see them. Once you 3D-print this circle, it will be the output of those 24 sides, not a smooth circle. You can increase the number of sides on a curved surface to increase the smoothness of the curvature.
G. Groupies are Fun
You need to group up all the edges and surfaces so that all of that makes up one complete, solid object. This is generally the last step in designing, so make sure that you have finished doing every edit you wanted to in the model. Also, check for any errors in your models that can prevent it from being a complete solid. For example, look for overlapping edges or faces, or look for absent faces, through which, as mentioned above, water can leak inside the model.
Your model may have errors inside as well as outside. Inspect this by turning on the x-ray view so that you can look inside the objects. If you see any overlapping surfaces or solids, that cannot conceivably be printed, delete them to create a singular solid there. Once you are sure that all leaks are patched and the whole model is definitely volumetric, you can select all and group the whole model into one solid object.
That?s it - you?ve dotted every i?s and crossed every t?s. Now you can happily export your model to an STL file and get it into your 3D printer. Happy printing