Beginner’s guide to creating your first 3D model using the SketchUp

A 3D model is a way of representing any structure in 2D that you see in your mind or in the blueprint but provides a much more accurate and effective way to study it.
Much renowned architecture has shifted towards 3D printed models for their architectural surveys and it no doubt gives a promising results most of the time. So, that is why 3D models nowadays are much popular globally.
Making 3D models is not too difficult, but one must become familiar with 3D modeling software, such as SketchUp, one of the most popular applications in this field. This article will provide beginners with the basics of making their first 3D model efficiently.
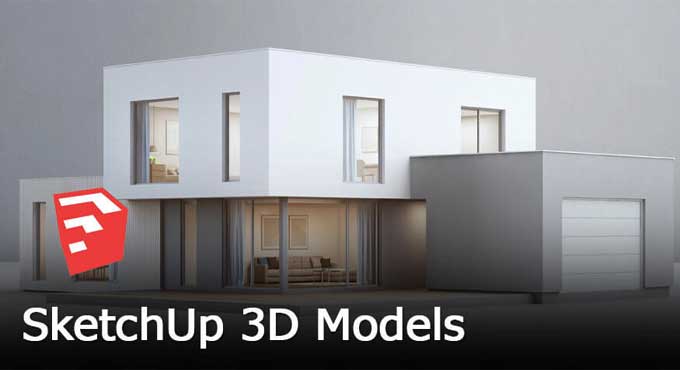
A 3D modeling program called SketchUp is used to create geometric 3D things, including architectural models, scale models, objects for interior design, and functional components. It's an application that offers you the ideal balance of quality and ease.
Known for its user-friendly interface and short learning curve, SketchUp is well known for its ease of use. SketchUp beginners will learn the essential tips and shortcuts for making their own models once they complete this tutorial.
There are two versions of SketchUp available: a freeware version and a paid version, SketchUp Pro. The basic commands and tools for modeling are the same in both versions when it comes to their essential features and commands.
Why choose SketchUp?
It is ideal for beginners to use SketchUp Free, while it is ideal for advanced users to use SketchUp Pro.
As far as the first is concerned, it provides all the commands you can use for 3D modeling, and the latter provides additional features, such as the ability to print in scale or export/import to/from CAD software.
Steps to create your first 3D model
Below mentioned some basic and easy-to-learn tutorials on how to create your first 3D model:-
Step 1: Workspace
When you first launch SketchUp, a dialogue allowing you to choose the workspace you wish to use will display. The Learn, License, and Template tabs are displayed in the window. There is a list of available presets under the Template tab. These differ according to the kind of modeling you'll be undertaking.
It only affects the aesthetic elements of your model, such as the type of model to be created and the method of measurement, if you choose presets or templates.
You should definitely check out these templates, but for the time being, let's utilize the Basic Templates available so that the model doesn’t get too complicated for your to handle.
On the lower right side of the window, click the template, and then click the Start with SketchUp button. Moreover, be sure to click the Always display on the startup box on the lower left side of the screen, as doing so will allow you to choose any template each time you launch the application.
Step 2: Get access to the toolbar
There are several commands and tools available in SketchUp. You will notice the standard toolbars on your first SketchUp workspace in the upper portion of your screen. To access the toolbar follow the steps mentioned below:-
1. Click on the “View” option
2. Then on the “Toolbars” option.
This session requires you to use the "Big Tool Set" from the list of toolbars displayed in a window.
The majority of the tools required to create a 3D model are included in this toolbar. Examine the Big Tool Set. The other toolbars should also be unchecked to minimize confusion and pointless complexities.
Step 3: Know about the Axis
SketchUp uses the workspace's Red, Green, and Blue axes just like any other 3D software. You may do this to see your work from various angles. Moreover, SketchUp's snapping tool helps you align your lines or models along the various axes.
As soon as we have our toolbar ready and can clearly see the three axes of the three-dimensional space, let's start creating the initial shapes in 2D.
Step 4: learn how to draw rectangles and squares
Rectangle
1. Click the Rectangle icon next to the pencil sign on the left, or just hit R on your computer, to begin drawing a rectangle or square.
2. To allocate the initial corner of your rectangle or square, click the appropriate position.
3. Click and drag the mouse to the required spot on the opposing corner.
To learn more, watch the following video tutorial.
Video Source: Tutorials Tips
Circles
1. Click the circle symbol underneath the rectangle icon or just type C on your keyboard to begin drawing a circle.
2. To set the circle's center, click the appropriate spot.
3. Click after creating a circle with the mouse anywhere on the screen.
4. Just enter the value after Step 2 and press Enter to define the radius.
Step 5: Controlling the Movements
Orbiticon
1. Click the icon or hit "O" on your keyboard to utilize the "Orbit" feature in the toolbar.
2. To rotate the entire view, click anywhere, hold the button, and drag.
3. Orbiting can also be done with the mouse wheel.
Step 6: Don’t forget to save
Make sure to periodically save your file so that you don't lose your progress. Click File > Save to accomplish this, or you may just hit Ctrl + S on your computer. Choose the directory where you want your file to be placed after entering the filename.