Mastering 2D Planning with SketchUp: A Comprehensive Guide

SketchUp, renowned for its prowess in 3D modeling, is also a versatile tool for creating detailed 2D plans. Whether you are an architect, interior designer, or hobbyist, mastering the art of 2D planning in SketchUp can streamline your design process and enhance your workflow efficiency.
Understanding 2D Planning in SketchUp
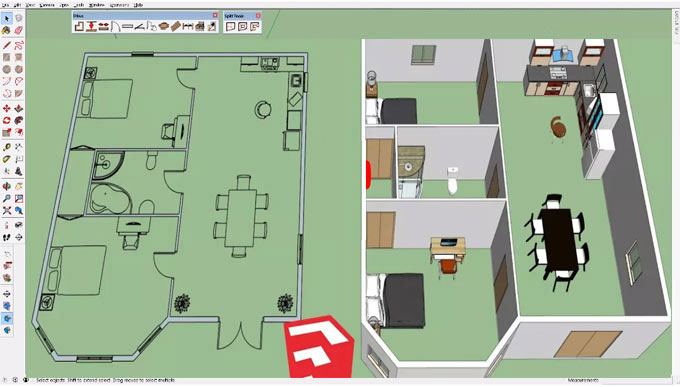
Before we dive into the specifics, let us clarify what we mean by "2D planning" in SketchUp. While SketchUp is primarily known for its 3D modeling capabilities, it also offers robust tools for creating 2D representations of architectural floor plans, site plans, elevations, and more.
These 2D plans serve as essential blueprints for communicating design intent, spatial relationships, and construction details in a clear and concise manner.
Getting Started with 2D Planning
To begin creating a 2D plan in SketchUp, follow these simple steps:
Start with a Template: Launch SketchUp and select a template that suits your project needs. You can choose from various templates tailored for architectural, engineering, or construction projects, or customize your own template with specific units, scales, and drawing settings.
Set Up Your Workspace: Familiarize yourself with the SketchUp interface and navigation tools. The main toolbar provides access to essential drawing and editing tools, while the drawing area serves as your canvas for creating and manipulating geometry. Use the navigation tools such as Orbit, Pan, and Zoom to navigate around your model efficiently.
Draw Your Floor Plan: Begin by drawing the outline of your floor plan using the Line, Rectangle, or Polygon tools. SketchUp's inference and snapping features help you align and connect geometry accurately, ensuring precision and consistency in your floor plan layout. Take advantage of guidelines, grid snapping, and inference points to maintain alignment and symmetry in your drawing.
Add Walls, Doors, and Windows: Once you have drawn the basic outline of your floor plan, use the Rectangle and Offset tools to create walls of the desired thickness. Then, use the Line and Rectangle tools to add doors, windows, and other architectural elements to your plan. SketchUp's push-pull tool allows you to extrude walls to the desired height, creating a three-dimensional representation of your floor plan.
Detail Your Plan: Add detail to your floor plan by incorporating additional elements such as furniture, fixtures, and annotations. SketchUp's extensive 3D Warehouse library provides a vast collection of pre-made components that you can import and customize to fit your design aesthetic. Alternatively, you can create custom components using SketchUp's drawing and editing tools, allowing you to personalize your floor plan with precision and creativity.
Organize Layers and Groups: To maintain clarity and organization in your 2D plan, use SketchUp's layers and groups features to organize geometry into logical groupings. Grouping related elements together allows you to hide or isolate specific components for easier editing and presentation. Additionally, assigning layers to different categories of geometry helps you control visibility and manage drawing complexity effectively.
Dimension and Annotate: Once your floor plan is complete, add dimensions and annotations to communicate key measurements, room labels, and design notes. SketchUp's Dimension and Text tools allow you to add accurate dimensions and annotations directly to your plan, enhancing clarity and comprehension for clients, collaborators, and contractors.
Export and Share Your Plan: When your 2D plan is ready for presentation or collaboration, export it in a suitable format such as PDF, DWG, or image file. SketchUp provides various export options that allow you to customize settings such as scale, resolution, and line weights for optimal output quality. Share your plan with stakeholders via email, cloud storage, or printed documents, ensuring seamless communication and feedback exchange throughout the design process.
Advanced Techniques and Tips
Now that you've mastered the basics of creating a 2D plan in SketchUp, let's explore some advanced techniques and tips to elevate your workflow:
Utilize Components and Symbols: Take advantage of SketchUp's component functionality to create reusable symbols for common architectural elements such as doors, windows, and furniture. By creating standardized components, you can streamline your workflow, maintain consistency across multiple plans, and facilitate design iteration and exploration.
Master Layer Management: Develop a systematic approach to layer management to streamline your workflow and improve drawing organization. Use descriptive layer names, group related geometry onto separate layers, and establish a layer hierarchy that reflects your project's structure. Effective layer management enhances drawing clarity, simplifies editing tasks, and promotes collaboration among team members.
Harness Dynamic Components: Experiment with SketchUp's dynamic components feature to create interactive and parametrically driven elements within your 2D plans. Dynamic components allow you to add intelligence to your design elements, such as adjustable door swings, scalable furniture, or customizable fixtures. By incorporating dynamic components into your plans, you can enhance visualization, flexibility, and user interaction, enriching the design experience for clients and stakeholders.
Explore Layout Integration: SketchUp's companion software, LayOut, offers powerful tools for creating professional-quality presentations and documentation from your SketchUp models. Explore the integration between SketchUp and LayOut to leverage advanced layout features such as viewport management, annotation layers, and dimension styles. By seamlessly transitioning between SketchUp and LayOut, you can produce comprehensive design packages, construction documents, and client presentations with ease and efficiency.
Stay Updated and Engage with the Community: Keep abreast of the latest SketchUp updates, features, and extensions to enhance your productivity and creativity. Participate in online forums, user communities, and training resources to exchange knowledge, seek assistance, and discover new techniques for optimizing your 2D planning workflow. Engaging with the SketchUp community fosters collaboration, inspiration, and continuous learning, empowering you to push the boundaries of design excellence and innovation.
Conclusion
In conclusion, SketchUp offers a wealth of tools and capabilities for creating detailed and precise 2D plans for architectural, interior design, and construction projects. By mastering the fundamentals of 2D planning in SketchUp and exploring advanced techniques and tips, you can streamline your workflow, enhance design communication, and bring your creative visions to life with confidence and efficiency.
To learn more, watch the following video tutorial.
Video Source: Webb Tutorials
Whether you are sketching out a floor plan, annotating construction details, or presenting design concepts to clients, SketchUp provides the versatility and flexibility you need to excel in the dynamic world of architectural design and visualization.
So, roll up your sleeves, unleash your creativity, and embark on your journey to mastering 2D planning with SketchUp today.